
Main Courses
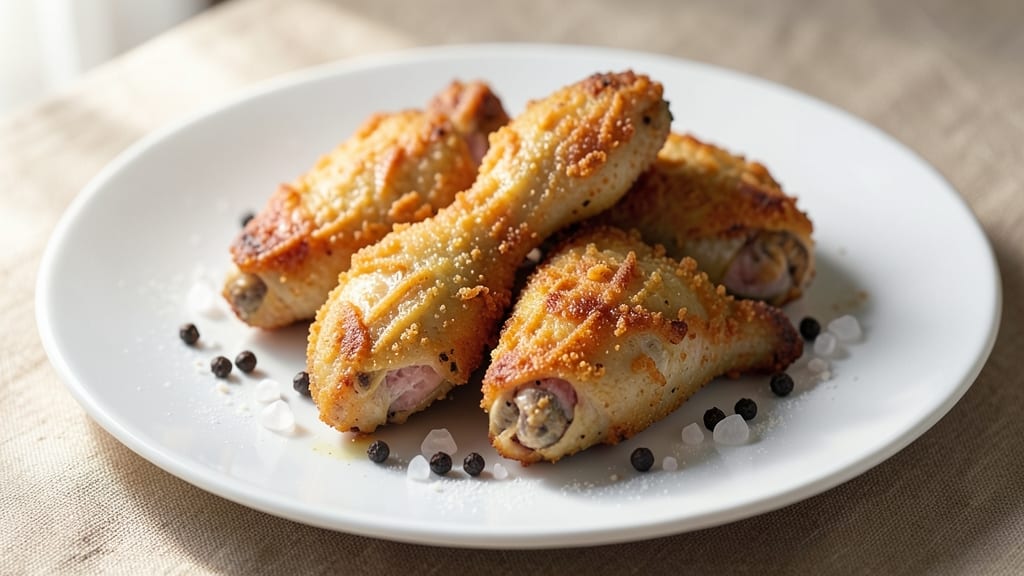
This air fried chicken pieces recipe delivers crispy-crusted, juicy-core magic that rivals restaurant-quality results. 🔥 The secret lies in a simple buttermilk marinade and a double-dip coating technique that ensures every bite has that perfect crunch without sacrificing tenderness.
I developed this method after testing countless variations, and it consistently delivers golden, shatteringly crispy pieces with moist interiors—no deep frying required.
What makes this recipe stand out is the balance of simplicity and technique. You'll start with chicken pieces marinated in buttermilk for 30 minutes, then coat them in a blend of seasoned flour and cornstarch before air frying at 375°F for 12-15 minutes.
The cornstarch creates that signature crispiness, while the buttermilk keeps the meat impossibly tender. This method works with thighs, drumsticks, or breasts—just adjust the cooking time slightly based on your preference.
The result is chicken pieces with a crispy, golden-brown crust that shatters at the touch, revealing juicy, flavorful meat inside. The buttermilk marinade adds a subtle tang that pairs perfectly with classic dipping sauces like honey mustard, BBQ, or ranch.
Serve with a side of coleslaw or crispy fries for a complete meal that's sure to impress—whether you're feeding a family or hosting game day.
This recipe is designed to be foolproof, with clear instructions that ensure success every time. The air fryer method delivers restaurant-quality results with minimal effort, making it perfect for weeknight dinners or special occasions. Once you try this, you'll never go back to deep-fried or oven-baked chicken again.
Ingredients for air fried chicken pieces
Buttermilk marinade meets crispy-crusted technique for restaurant-quality air-fried chicken pieces.
| Ingredient | Amount | Notes |
|---|---|---|
| Boneless, Skinless Chicken Thighs 🍗 | 1 ½ lb | Cut into even 2-inch pieces |
| Buttermilk 🥛 | 1 cup | Full-fat for optimal tenderness |
| All-Purpose Flour 🌾 | 1 cup | For dredging, sifted preferred |
| Cornstarch 🌾 | ¼ cup | Critical for crispiness |
| Diamond Crystal Kosher Salt 🧂 | 1 ½ tbsp | Fine grain preferred |
| Ground Black Pepper 🌶️ | 1 tsp | Freshly cracked for intensity |
| Garlic Powder 🧄 | 1 tsp | For aromatic depth |
| Smoked Paprika 🌶️ | ½ tsp | For subtle smokiness |
| Onion Powder 🧅 | ½ tsp | Enhances savory notes |
| Extra-Virgin Olive Oil 🫒 | 1 tbsp | For light basting |
| Fresh Lemon Juice 🍋 | 1 tbsp | Brightens the marinade |
| Unsalted Butter 🧈 | 1 tbsp | Melted for basting |
The chicken thighs are non-negotiable here—dark meat stays juicier during air frying than breasts. Look for bone-in, skin-on pieces at Whole Foods or your local butcher for maximum flavor, but boneless works fine too. The buttermilk is the secret weapon: full-fat is critical—low-fat versions won't deliver that tender, juicy core. If you can't find buttermilk, substitute with 1 cup milk plus 1 tbsp vinegar, but let it sit for 10 minutes to curdle properly. For the spices, Penzeys or Spicewalla deliver superior quality, but even your grocery store's basic kosher salt and paprika will work if you're in a pinch.
The double-dip technique—flour first, then cornstarch—is what creates that signature shatteringly crisp crust. Don't skip the cornstarch—it's the magic ingredient that gives you that deep-fry-like crunch without the mess. If you're out of cornstarch, arrowroot powder at half the amount works in a bind. For the seasoning blend, toast your spices lightly in a dry pan for 30 seconds to deepen their flavor. The olive oil in the marinade helps the seasoning adhere, but avocado oil works just as well if you prefer a neutral flavor. And that melted butter at the end? Trust me on the full-fat version—it bastes the chicken with rich, golden flavor as it cooks.
Prep the chicken and marinade up to 4 hours ahead—the longer it soaks, the more tender it becomes. Store the marinated pieces in a sealed container in the fridge. The dry seasoning mix keeps for 3 months in an airtight container, so make extra for future batches. Air-fried chicken reheats beautifully—5 minutes at 350°F restores that crispy texture. For meal prep, portion the cooked chicken into single-serving containers with a small amount of air fryer oil sprayed on top to maintain crispiness for up to 3 days. Freeze any extras for 3 months—just thaw in the fridge overnight before reheating.
Why You'll Love This Recipe
- No-Fuss Coating: The buttermilk marinade and cornstarch flour blend create that perfect crispy-tender texture without fussy double-dredging. Just toss, let it sit, and air-fry—no deep-frying mess, no waiting for oil to heat.
- Crispy-Creamy Magic: That buttermilk soaks in while the cornstarch crust locks in juices, giving you a shatteringly crisp exterior and a juicy, almost buttery interior. Honestly, it’s the kind of contrast that makes you forget takeout exists.
- Game for Any Meal: Toss these into salads midweek, serve them over rice for date night, or pack them for lunchboxes—they’re just as happy as a quick snack or a full meal. My college-aged kids grab them straight from the air fryer when I forget to make dinner.
- Budget-Friendly Crunch: Chicken thighs are cheaper than breasts, and this recipe stretches further than you’d think. Leftovers? Reheat in the air fryer for the same crispy results, and you’ve got a week’s worth of easy lunches without breaking the bank.
Step-by-step instructions for crispy air-fried chicken pieces
Master the perfect balance of crunch and moisture with this foolproof air-frying technique.
👨🍳 Step 1: Prepare the Chicken and Marinade
Cut the 1.5 lb boneless, skinless chicken thighs into even 2-inch pieces for consistent cooking. In a bowl, whisk together the 1 cup buttermilk, 1 tbsp fresh lemon juice, and 1 tbsp extra-virgin olive oil. This marinade tenderizes the meat and adds brightness—let the chicken soak for at least 30 minutes (up to 2 hours in the fridge) for maximum flavor penetration.
I always use a zip-top bag for marinating—it minimizes mess and ensures every piece gets coated evenly. The acidity in the lemon juice breaks down proteins, while the buttermilk adds richness that carries through the crispy crust.
👨🍳 Step 2: Create the Crispy Coating
In a shallow dish, combine the 1 cup all-purpose flour, 0.25 cup cornstarch, 1.5 tbsp diamond crystal kosher salt, 1 tsp garlic powder, 0.5 tsp smoked paprika, 0.5 tsp onion powder, and 1 tsp ground black pepper. The cornstarch is non-negotiable—it creates that signature crispy texture while the flour provides structure. Whisk everything together until there are no lumps.
Remove the chicken from the marinade (let excess drip off) and pat dry with paper towels—this prevents steam from interfering with the crust formation. Working in batches if needed, dredge each piece thoroughly, pressing the coating onto the meat so it adheres well. Let the coated chicken rest for 5 minutes before air frying—this helps the coating set.
🔥 Step 3: Air Fry to Golden Perfection
Preheat your air fryer to 375°F for 5 minutes—this ensures even cooking from the start. Arrange the chicken pieces in a single layer, leaving ½-inch space between them for proper air circulation. Air fry for 12 minutes, then flip each piece and spray lightly with melted unsalted butter using an oil spray bottle. The butter adds moisture and enhances browning.
Continue air frying for another 8-10 minutes until the chicken reaches an internal temperature of 165°F and the exterior is deep golden brown with crispy edges. Watch closely after the 12-minute mark—air fryers vary, and you want that perfect balance of crunch without burning. If any pieces brown too quickly, move them to the back of the basket.
⏰ Step 4: Rest and Serve
Transfer the chicken to a wire rack set over a plate and let it rest for 5 minutes. This resting period is crucial—it allows the juices to redistribute, preventing them from pooling on the cutting board. The exterior will stay crispy while the interior remains juicy and tender.
Serve immediately with your favorite dipping sauce or over a fresh salad. Each piece should have a shatteringly crisp exterior that gives way to moist, flavorful meat inside. The cornstarch coating creates that satisfying crunch while the buttermilk marinade keeps the chicken impossibly tender.
Pro Tips For Making Air Fried Chicken Pieces
- CRANK THE HEAT FIRST: Air fryers lose steam when overcrowded, but they also need a hot start—400°F for the first 3 minutes guarantees a crispy crust before the temp drops from adding too many pieces. I learned this the hard way after serving soggy edges to guests who swore they’d never order takeout again.
- SALT THE BUTTERMILK: Diamond Crystal kosher salt dissolves slower than table salt, so mix in 1½ teaspoons per cup of buttermilk before marinating the chicken. This ensures even seasoning—no dry spots or bland bites. (Yes, even if you’re impatient like me, give it 10 minutes to soak.)
- PAT DRY AFTER MARINATING: Wipe the chicken pieces with paper towels after buttermilk soaking—even if they look wet. The cornstarch-flour mix needs contact with dry surfaces to stick properly. I skip this sometimes, and the coating falls off in chunks during frying.
- FLIP ONCE, REST TWICE: Turn the chicken after 8 minutes (not before), then let it sit undisturbed for 3–4 minutes before flipping again. This locks in moisture while the crust sets. Crowding the basket mid-cook steams the chicken instead of crisping it—trust the process.
Make-ahead tips for air fried chicken pieces
Marinate Ahead
The buttermilk marinade works best when the chicken soaks for at least 30 minutes, but I recommend marinating up to 4 hours ahead for maximum tenderness. Store the chicken pieces in a sealed container in the fridge.
The acidity in the buttermilk and lemon juice will break down the proteins, ensuring juicy results even after air frying. 🥛
Prep Coating Mix
Make the seasoned flour mixture 1 day ahead and store it in an airtight container. This saves time on cooking day and ensures the spices are evenly distributed. The cornstarch in the mix is key—it creates that signature crispy texture, so don't skip it.
If you're short on time, you can mix the dry ingredients the morning of and keep them at room temperature until ready to use. 🌾
Batch Cooking
Air fryers have limited capacity, so plan to cook in batches if you're feeding a crowd. I find that 2 batches of 6 pieces each works perfectly in my 6-quart Cosori air fryer.
Cook the first batch completely, then add the second batch to the air fryer while the first rests. This keeps everything hot and crispy when serving. Pro tip: Use a meat thermometer to check the internal temperature of the second batch—it should reach 165°F just like the first. 🌡️
Reheating Magic
Cooked air-fried chicken reheats beautifully—just 5 minutes at 350°F in the air fryer restores that crispy texture. For best results, spray the chicken lightly with oil before reheating. Store leftovers in airtight containers for up to 3 days or freeze for 3 months.
When reheating from frozen, thaw overnight in the fridge first for even cooking. 🔥
Freezer-Friendly
Freeze uncooked, marinated chicken pieces in a single layer on a tray before transferring to a freezer bag. This prevents clumping and makes it easy to grab individual pieces. Cook straight from frozen—just add 5 extra minutes to the air frying time.
The buttermilk marinade keeps the chicken tender even after freezing, so you won't sacrifice texture. Label your bags with the date to track freshness. ❄️
Meal Prep Hack
Portion the cooked chicken into single-serving containers with a small amount of air fryer oil sprayed on top. This maintains crispiness for up to 3 days in the fridge. I like to pair prepped portions with pre-made dipping sauces for grab-and-go meals.
For extra convenience, store the dipping sauces in small containers that fit perfectly in your lunchbox. 💡
Nutrition facts
Frequently asked questions
Can I use chicken breasts instead of thighs?
Yes, but you'll need to adjust the cooking time and technique. Chicken breasts cook faster and can dry out more easily. Cut them into 1-inch thick pieces and reduce air frying time to 10-12 minutes total (5 minutes per side with butter basting). For extra tenderness, pound the breasts to even thickness before marinating. The buttermilk marinade still works perfectly—just monitor closely to avoid overcooking.
Why is my air-fried chicken soggy instead of crispy?
Soggy chicken usually means one of three things: overcrowding in the air fryer, not patting dry before coating, or skipping the cornstarch. Leave ½-inch space between pieces, pat them thoroughly with paper towels, and always use that cornstarch-flour mix. Also, don't overcook—chicken should reach 165°F internal temp, not burn. For extra crispiness, spray with melted butter halfway through.
What's the best dipping sauce for this recipe?
Any creamy or tangy sauce works perfectly! Try honey mustard (mix 2 tbsp Dijon + 3 tbsp honey + ¼ cup mayo), spicy ranch (add hot sauce to store-bought ranch), or BBQ glaze (simmer ½ cup BBQ sauce + 1 tbsp brown sugar until thick). For something lighter, a lemon-herb aioli (mix mayo + lemon zest + chopped dill) adds fresh brightness that cuts through the richness.
Can I make this gluten-free?
Replace the all-purpose flour with 1 cup gluten-free 1:1 baking flour and use ¼ cup cornstarch as written. For best results, choose a blend with xanthan gum (like Bob's Red Mill) to mimic the binding properties of regular flour. The cornstarch still provides that signature crispiness, so don't skip it. Just ensure all your spices are certified gluten-free if you're highly sensitive.
How do I clean my air fryer basket after cooking?
Let the basket cool completely, then soak in hot water + 2 tbsp baking soda for 15 minutes to loosen grease. Scrub with a non-abrasive sponge (avoid steel wool) and warm soapy water. For stubborn bits, make a paste of baking soda + water, apply, let sit 10 minutes, then scrub. Always dry thoroughly before next use to prevent rust. Pro tip: Line the basket with parchment paper for easier cleanup next time!