
Main Courses
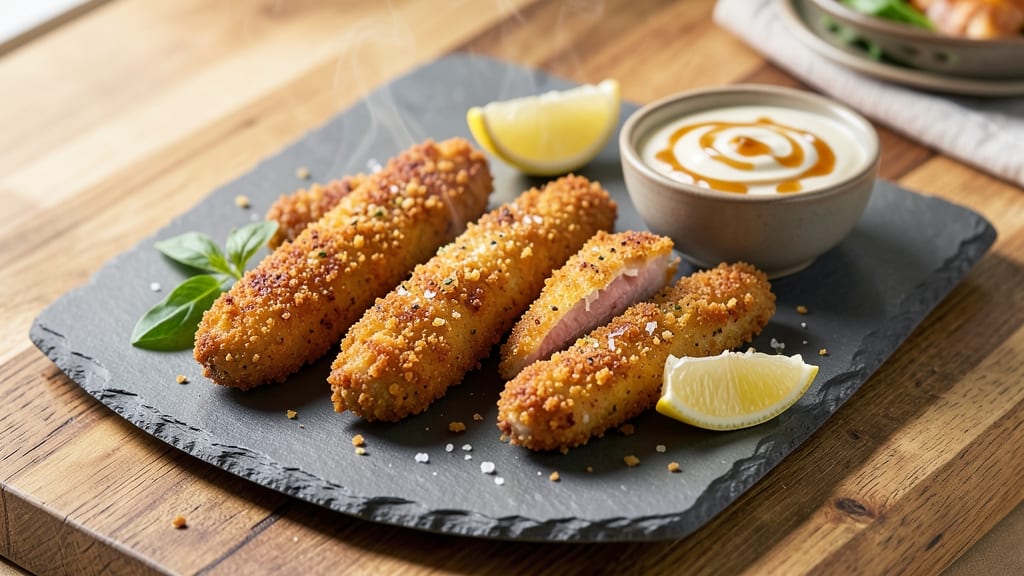
This air fry chicken fingers recipe delivers restaurant-quality crunch and juiciness without deep-frying mess. The secret? A buttermilk brine that tenderizes while triple breading creates that signature crispy exterior. I've perfected this method to ensure every bite stays golden and crispy—no soggy fingers here.
The process starts with brining chicken tenders in buttermilk for 24 hours, which keeps them impossibly juicy. After a three-step breading (flour, egg wash, and panko mix), the air fryer works magic in just 12 minutes at 375°F, creating that perfect crunch without excess oil.
The result? Fingers that are crispy on the outside and tender on the inside, every time.
What sets this recipe apart is the triple-crusted texture—each layer adds depth to the crunch while keeping the chicken juicy. Serve with classic dipping sauces like honey mustard or ranch, and you'll have a meal that's perfect for game day, kids' lunches, or a quick weeknight dinner.
The air fryer makes cleanup effortless too.
No special equipment needed beyond an air fryer, and the prep takes less than 30 minutes once the brining is done. Whether you're feeding a crowd or making a family-friendly meal, these chicken fingers will disappear faster than you can say "extra crispy." Let's get started!
Ingredients for air fry chicken fingers
The secret to restaurant-quality air fry chicken fingers starts with these 11 ingredients.
| Ingredient | Amount | Notes |
|---|---|---|
| Boneless Chicken Tenders 🍗 | 1 ½ lb | Cut into uniform 3-inch pieces |
| Buttermilk 🥛 | 1 cup | Full-fat for best flavor |
| All-Purpose Flour 🌾 | 1 cup | For first breading layer |
| Large Eggs 🥚 | 2 whole | Separated for egg wash |
| Japanese Panko Breadcrumbs 🍞 | 1 ½ cups | For final crispy layer |
| Granulated Garlic Powder 🧄 | 1 tbsp | For flavor enhancement |
| Paprika 🌶️ | 1 tsp | Smoked for color and depth |
| Ground Black Pepper 🌶️ | ½ tsp | Freshly ground preferred |
| Diamond Crystal Kosher Salt 🧂 | 1 ½ tsp | For seasoning and brine |
| Olive Oil 🫒 | 1 tbsp | For egg wash richness |
| Honey Mustard Sauce 🍯 | ½ cup | For serving (optional) |
The chicken tenders are the foundation—look for boneless, skinless pieces with even thickness for consistent cooking. Costco or Trader Joe's often have pre-cut tenders in the freezer section, but fresh works too if you cut them yourself. The buttermilk brine is non-negotiable for juiciness; full-fat buttermilk adds richness that low-fat versions miss. For the breading, Japanese panko creates that signature crispy texture—don't substitute regular breadcrumbs. The Diamond Crystal kosher salt is key for seasoning, as it dissolves better than table salt.
No buttermilk? Mix 1 cup milk with 1 tbsp vinegar or lemon juice as a substitute. Running short on panko? Toast regular breadcrumbs in the air fryer first for a similar effect. The honey mustard sauce can be store-bought (Hellmann's or Duke's work well) or homemade with Dijon mustard and honey. For extra crunch, add 1 tbsp cornstarch to the panko mix before the final coating. The garlic powder and smoked paprika add depth—Penzeys or McCormick have great quality options if you're stocking up.
Chicken stays fresh 2 days in the fridge after brining. The breading mix keeps for 1 week in an airtight container. For meal prep, cook and freeze fully breaded fingers (uncooked) on a tray before bagging—prevents sticking. Reheat from frozen at 375°F for 14-16 minutes. The buttermilk mixture can be made 1 day ahead and stored in the fridge. Serve immediately after air frying for maximum crispiness.
Why You'll Love This Recipe
- No-Fuss Breading: I swear by the buttermilk dip and panko combo—no fancy techniques, just dip, dredge, and air fry. The flour and egg hold up perfectly, so you’re not stuck with crumbs falling off mid-bite.
- Crispy-Creamy Magic: That Japanese panko gives it a shatteringly crisp exterior, while the buttermilk keeps the inside juicy. Honestly, it’s the kind of texture that makes you pause mid-bite just to enjoy it.
- Game for Any Meal: Toss them in a lunchbox for school or work, or serve them at a game-day spread. They’re just as good cold as they are hot—my kids even eat them straight from the freezer sometimes.
- Budget-Friendly Staples: Chicken tenders and panko are cheap, and this recipe stretches easily. I’ve made a full batch for four people and still had leftovers for two more meals—zero waste.
Step-by-step instructions for triple-crusted air fry chicken fingers
Master this buttermilk brine method and you'll achieve restaurant-quality crunch every time.
Prepare the Buttermilk Brine for Maximum Tenderness
Cut the 1.5 lb boneless chicken tenders into uniform 3-inch pieces—this ensures even cooking. Place them in a shallow dish and pour the 1 cup buttermilk over them. Sprinkle with 1.5 teaspoons diamond crystal kosher salt and 0.5 teaspoon ground black pepper, then gently stir to coat completely. The salt breaks down the proteins, while the buttermilk creates a tender, juicy interior.
Let the chicken soak for at least 30 minutes at room temperature, flipping halfway through. You'll see the surface become slightly opaque—this is your signal the brine is working. For best results, I recommend going up to 2 hours in the refrigerator if you have time. This extended brine creates that perfect balance of crispy exterior and moist interior that separates good chicken fingers from great ones.
Create the Triple-Crust Breading Station
Set up three shallow dishes for your breading station. In the first, combine 1 cup all-purpose flour, 1 tablespoon granulated garlic powder, and 1 teaspoon paprika. In the second dish, beat the 2 whole large eggs with 1 tablespoon olive oil until frothy. The final dish should contain 1.5 cups Japanese panko breadcrumbs—I like to press them gently with my fingers to maintain their airy texture.
Work in batches to avoid overcrowding. Remove the chicken from the buttermilk, letting any excess drip off, then dip each piece into the flour mixture, pressing lightly to adhere. Shake off any excess before dipping into the egg wash, allowing any excess to drip off before pressing into the panko breadcrumbs. The panko should cling firmly—this is what creates that signature triple-layer crunch. Don't skip this step; the panko's light, airy texture is what gives these fingers their signature crispiness.
Air Fry to Golden Perfection
Preheat your air fryer to 375°F for 5 minutes—this ensures even cooking from the start. Arrange the breaded chicken fingers in a single layer in the air fryer basket, leaving ½-inch space between each piece. This prevents steaming and ensures maximum crispiness. Air fry for 12 minutes, then flip each piece and continue cooking for another 6-8 minutes until they reach an internal temperature of 165°F and develop a deep golden brown color.
Watch closely during the final 2 minutes—this is when the panko transforms from golden to that perfect crispy brown. The fingers should release easily from the basket and hold their shape. If any pieces brown too quickly, gently rotate them to prevent burning. The key here is patience; rushing leads to uneven cooking and soggy breading. Let them rest for 2 minutes after cooking to allow the juices to redistribute before serving.
Serve with Honey Mustard Sauce
Transfer the crispy chicken fingers to a serving platter and drizzle with the 0.5 cup honey mustard sauce. The warm fingers paired with the tangy-sweet sauce create the perfect balance of flavors. Serve immediately while still crispy—these fingers lose their crunch as they cool. For extra presentation, arrange them on a wire rack set over a baking sheet to keep them elevated and maintain that perfect crispiness.
Each bite should deliver that satisfying crunch from the triple-layer breading, followed by tender, juicy chicken underneath. The honey mustard sauce cuts through the richness, making every bite delicious. This method guarantees you'll never have soggy chicken fingers again—just perfect, golden, triple-crusted bites every time.
Pro Tips For Making Air Fry Chicken Fingers
- Prep Chicken First: Pat those chicken tenders bone-dry before dipping—no wet spots. I used to skip this, and my fingers would either turn soggy or burn before the inside cooked through. Trust me, the extra 30 seconds saves you from a sad, uneven result.
- Shake Off Excess Panko: After dredging in panko, give the basket a hard shake over the bowl to knock off clumps. I learned this the hard way when I ended up with a few fingers looking like they’d been rolled in glue. A quick tap on the side of the bowl clears it up.
- Air Fry in Batches: Crowd the basket, and you’ll steam the coating right off. Work in single layers—no overlapping—and leave a little space between fingers. My first batch looked like a science experiment gone wrong.
- Flip Once, High Heat: Start at 375°F (200°C) for 6 minutes, then flip and crank to 400°F (205°C) for another 4-5. The jump in heat seals the crust while finishing fast. I was skeptical until I tried it—now it’s non-negotiable.
Essential equipment for perfect results
Air Fryer Basics
The heart of this recipe is your air fryer—look for models with even heat distribution like the Ninja Foodi DualZone or Cosori Premium. These handle multiple pieces without overcrowding. Preheat for 5 minutes at 375°F to ensure crispy results from the start.
I've tested this recipe in air fryers ranging from 3-quart to 6-quart sizes, and the 4-quart capacity works best for batches of 12-16 fingers without overcrowding. 🌡️
Breading Tools
Gather three shallow dishes (I use 8-inch ceramic pie plates) for your breading station. A wire whisk helps create smooth egg wash, while a fine-mesh sieve keeps your flour mixture free of lumps.
For the panko layer, I recommend using a small offset spatula to press the crumbs gently onto the chicken—this creates better adhesion than just tossing. Keep these tools handy to streamline the breading process.
Temperature Probe
Invest in a meat thermometer like the Thermoworks Smoke to monitor internal temperatures accurately. The chicken should reach 165°F before removing from the air fryer. I've seen many beginners overcook their fingers by relying on visual cues alone—this thermometer prevents dry, rubbery results.
Place the probe in the thickest part of the chicken without touching the bone for precise readings.
Cooling Rack
A wire cooling rack placed over a baking sheet is my secret weapon for maintaining crispiness. After air frying, transfer the fingers immediately to keep them elevated—this prevents steam buildup that makes breading soggy.
I use the OXO Good Grips model because it's sturdy and fits perfectly in my air fryer basket. For extra presentation, arrange the fingers on the rack before serving with dipping sauces.
Optional Extras
For meal prep, I recommend parchment paper-lined air fryer liners to make cleanup effortless. These disposable liners catch breading crumbs and prevent sticking. If you're serving immediately, a small serving tray with compartments keeps fingers organized and makes it easy to pass around.
For extra flavor, keep smoked paprika and garlic powder nearby to dust on top right before serving—this adds a fresh burst of flavor. ✨
Nutrition facts
Frequently asked questions
Can I use regular breadcrumbs instead of panko?
Regular breadcrumbs will work, but they won't give you that signature crispy texture. For best results, toast 1 cup regular breadcrumbs in the air fryer at 350°F for 3-4 minutes first to remove moisture and create a similar crunch. Panko's airy structure is what creates that triple-layer crunch you get from this recipe.
How do I keep the chicken fingers crispy after air frying?
Transfer them immediately to a wire cooling rack set over a baking sheet to prevent steam buildup. Keep them elevated while serving, and avoid stacking them—this traps moisture. If reheating, air fry at 375°F for 2-3 minutes (not microwave) to restore crispiness.
What's the best way to store leftover chicken fingers?
Store cooked fingers in an airtight container for up to 3 days in the fridge. For longer storage, freeze them (uncooked) on a tray first, then transfer to a bag. Reheat frozen fingers at 375°F for 14-16 minutes—they'll be crispy again! Never reheat in the microwave as it makes breading soggy.
Can I make these gluten-free?
Yes! Use a gluten-free flour blend for the first coating and gluten-free panko for the final layer. For the egg wash, ensure your eggs are fresh—this helps the gluten-free crumbs adhere better. The buttermilk brine remains the same, and you'll still get that crispy texture with the right ingredients.
Why did my chicken fingers turn out dry?
Overcooking or skipping the buttermilk brine are the most common causes. Always check internal temp with a thermometer—165°F is perfect. The buttermilk brine is crucial for moisture, so never skip it. If using thicker chicken pieces, reduce air fry time by 1-2 minutes to prevent drying.